MyTheatre

This idiots guide is for users that need to install and setup MyTheatre in the shortest time possible.
This tutorial assumes that you have a supported DVB device properly installed and connected to a satellite dish. Also note for the purpose of this tutorial I aimed the dish at the Hotbird satellite but you could use any satellite.
Step 1.
For this tutorial I am using Mytheatre v2.76 full which can be downloaded from here http://www.sat.joy.ro/download.html
Step 2.
Double click on the Mytheatre executable file and the following window should be displayed, select 'Next'

Step 3.
The following License Agreement window will be displayed, read the agreement ;-) and then select 'I Agree'

Step 4.
The following Mytheatre Setup window will be displayed, do not select 'Next' at this point !

Step 5.
Important
Click on the drop down box and select 'Full (Install Everything)' as displayed below, then select 'Next'

Step 6.
The following window will be displayed, select 'Install'

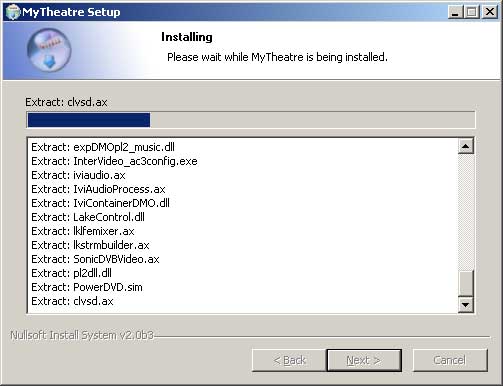
Step 7.
MyTheatre will now start the installation to your harddrive as displayed below
Step 8.
During the installation process the following Sonic Video Decoder Setup window will be displayed, I would normally select 'Yes' as I display my picture on TV as well as PC monitor

Step 9.
Again during the installation the following AC3Config window will be displayed, I normally leave the default settings and select 'OK' if you change any of the settings do not forget to select 'Apply' before selecting 'OK'

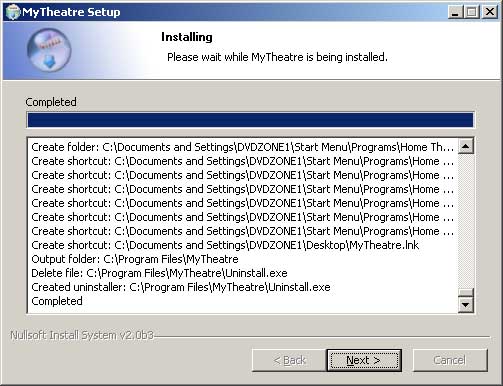
Step 10.
The following window will be displayed to confirm the installation of MyTheatre is now complete, now select 'Next'
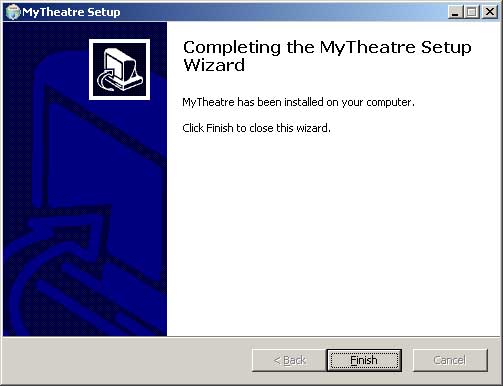
Step 11.
The following window will be displayed, now select 'Finish'
Step 12.
Now MyTheatre is installed double click on the MyTheatre icon on your desktop

Step 13.
The following will now be displayed on screen
Step 14.
The first task to do is to setup MyTheatre for your hardware, to do this 'Right Click' on the large black video pane and select 'General Settings' the following window will be displayed
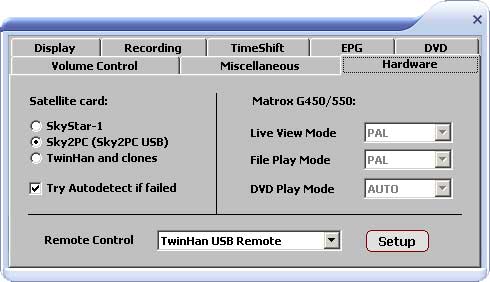
Step 15.
Select the 'Hardware' tab and select the type of DVB hardware you are using, in this case I am using a Skystar 2 so I select 'Sky2PC (Sky2PC USB)'
Step 16.
It will also be worth selecting the 'Miscellaneous' tab and making sure that 'Change Channel by Single Click' is checked as shown below then close this window. At this point it might also be worth closing down MyTheatre and restarting it for the changes to take affect
Step 17.
Now you have set MyTheatre up for your hardware you need to scan some satellites for channels to do this 'Right Click' on the large black window and select 'LNB/DiSEqC settings & scan...' and the following window will be displayed
Step 18.
Now complete the following steps carefully


1. Select the required satellite in this case we have used HotBird
2. Select 'Ku-L' (LOF1\ SW \ LOF2 should now be populated)
3. Select 'Apply' this action sets the satellite and applies the changes
4. Select 'Select All' the list of transponders should now be highlighted
5. Select 'Scan'

Providing you have followed the above steps a small window should appear showing you the scanning process.
Once the scanning process is complete close the window by clicking on the 'X' in the top right corner and then close down the above window by clicking on the 'X' in the top right hand corner
Step 19.
Now in the right Channel List pane select 'Sat' and then select the '+' sign next to Hotbird the list should then expand to show each channel
Tip
If you just want to see video channels only in the list then select the 'V' sign in the top right-hand corner the list will then change to show only video channels

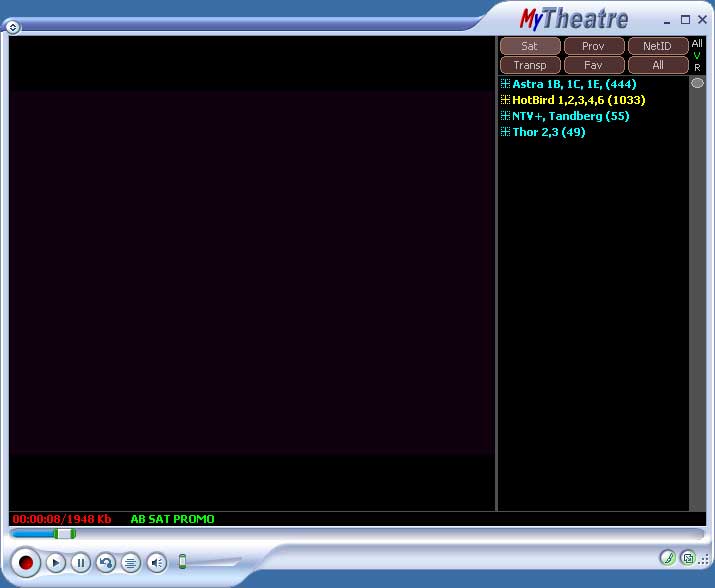
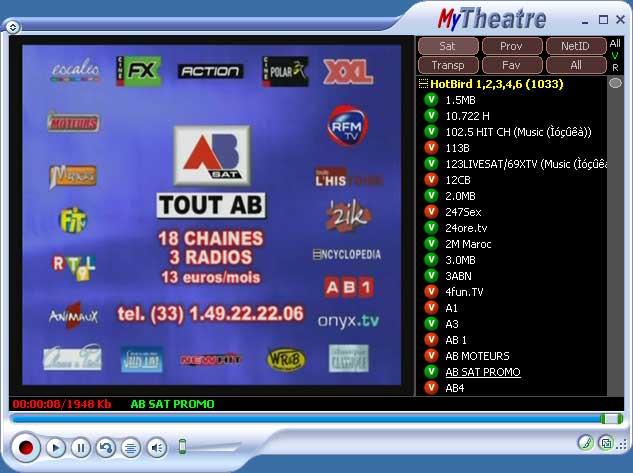
Step 20.
Now to check that MyTheatre can display FTA channels select the 'AB SAT PROMO' channel and a picture should be displayed in the video pane as shown below
Step 22.
If the channel is not displayed then 'Right Click' on the video pane and make sure 'Video On/Off' is ticked.
Step 22.
If this does not resolve the problem then 'Right Click' on the video pane and select 'Graphs' then select the appropriate Graph for your operating system and hardware
Step 23.
If the above does not resolve the problem then check to make sure you have a signal, do this by clicking on the bottom right hand corner of the screen as shown below and a signal meter will be displayed. If there is no signal then recheck your hardware again
Step 24.
Now you know that MyTheatre is working for FTA channels you now need to get it working for encrypted channels.
To do this you first need to download the following files
S2emu 1.07 (this version includes other files required to decrypt certain providers channels)
Softcam.key (most recent version required)
Step 25.
Once you have downloaded these files make sure MyTheatre is closed and then do the following
Put the S2emu.dll file into the following directory
C:\Program Files\MyTheatre\MDPlugins\
Then put the rest of the files including Softcam.key in to the following directory
C:\Program Files\MyTheatre\
Step 26.
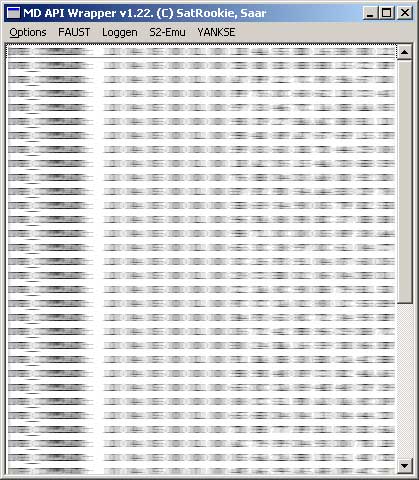
Now restart MyTheatre, once it has restarted you may need to disable the Yankse plugin to do this 'Right Click' on the main video pane and select 'Plugins' then 'MD API Wrapper' the following window will then be displayed
Step 27.Select the 'YANKSE' tab at the top and then un-tick 'Active' at the same time select the 'S2-Emu' tab and make sure 'Enabled' is ticked then close the windowAt this point it maybe wise to restart MyTheatre
Step 20.
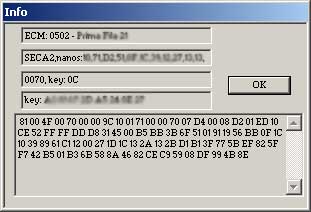
Now select a encrypted channel (you know which ones) to check that 'S2emu' is working by 'Right Clicking' on the video pane, then select 'Plugins' then 'MD API Wrapper' then 'S2-Emu' tab , a window like the one below should be displayed if not then you may need to update the 'softcam.key' or the channel may not be supported

Please note this guide is for educational purposes only
It is illegal to view encrypted channels without a valid subscription