ProgDVB

This idiots guide is for users that need to install and setup ProgDVB in the shortest time possible.
This tutorial assumes that you have a supported DVB device properly installed and connected to a satellite dish. Also note for the purpose of this tutorial I aimed the dish at the Hotbird satellite but you could use any satellite.
Step 1.
Download the latest ProgDVB in this case we are using version 4.42.2 (ProgDVB Site)
Step 2.
Double click on the ProgDVB executable file and the following window should be displayed on screen
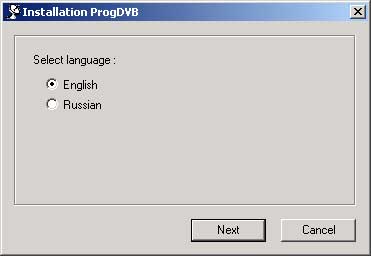
Step 3.
Select the relevant language, in this case it is English and select 'Next' the following window will be displayed on screen
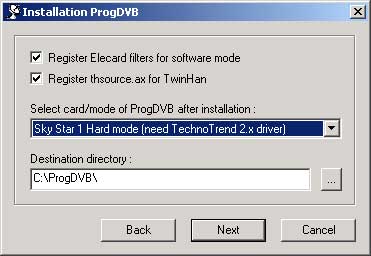
Step 4.
Now select the drop down menu and choose the device you are using in this case the hardware is a Skystar 2 PCI Card, then select 'Next'
Step 5.
The following window will be displayed, I would not normally touch these settings just select 'Next'
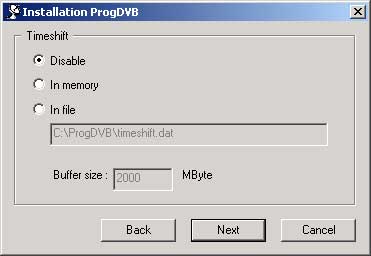
Step 6.
The following window will be displayed, I would not normally touch these settings just select 'Next'
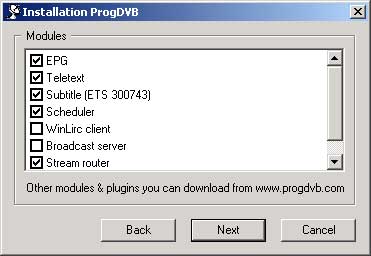
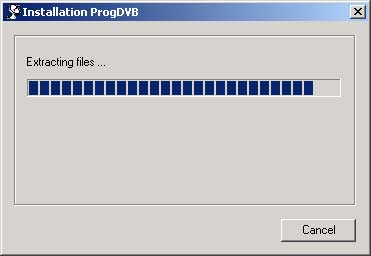
Step 7.
The following window should now be displayed showing the progress ProgDVB installation
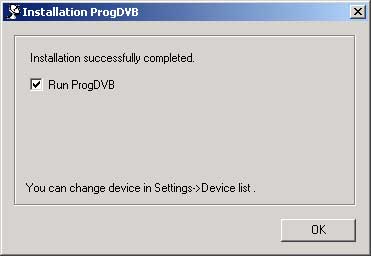
Step 8.
ProgDVB should now be installed and the following window should be displayed on your screen just select 'OK'
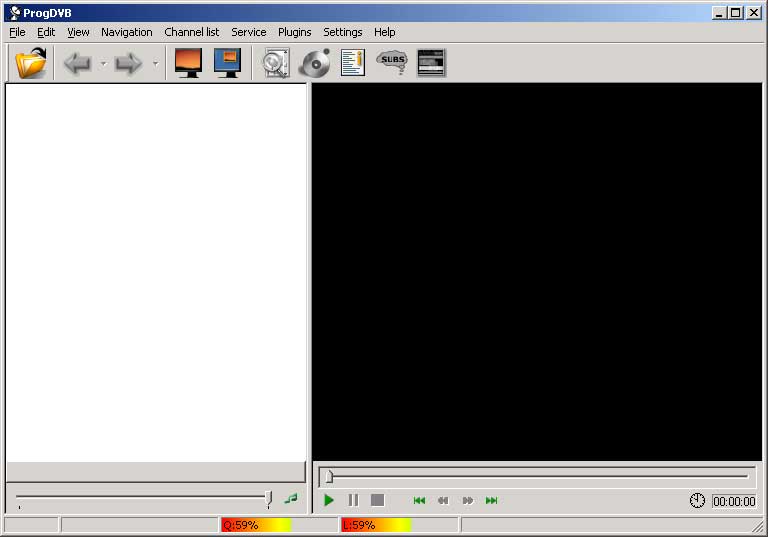
Step 9.
ProgDVB should now start on your PC and the following window should be displayed
Step 10.
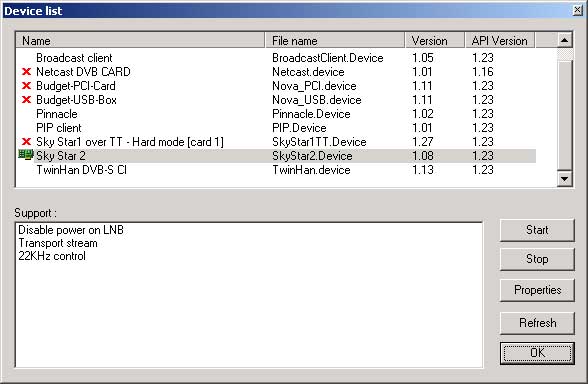
The first thing to do is make sure ProgDVB has been setup for your hardware, do this by selecting the 'Settings' menu then 'Device List' and the following window will be displayed.
Make sure your device is highlighted with a card icon next to it, if not then select your device from the list and select 'Start' wait a few seconds the card icon should then appear next to your device then select 'OK'
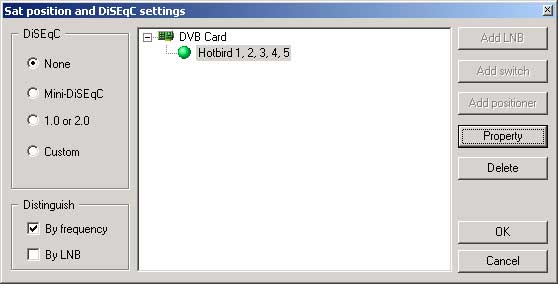
Step 11.
Now you need to setup your satellites, do this by selecting 'Settings' then 'DiSEqC' the following window should now be displayed
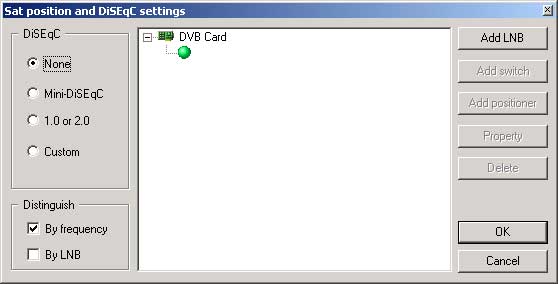
Step 12.
For this example we are going to setup hotbird on 1 LNB, select the small green circle under DVB Card and select 'Property' the following window will be displayed
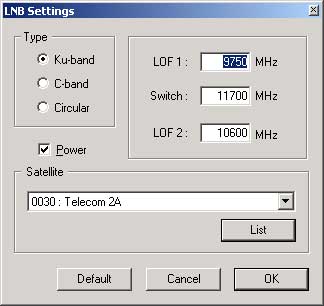
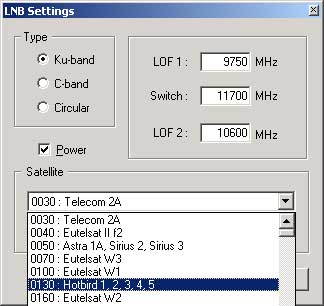
Step 13.
Now select Hotbird from the Satellite drop down menu then select 'OK'
Step 14.
The following window should now be displayed on screen, then select 'OK'
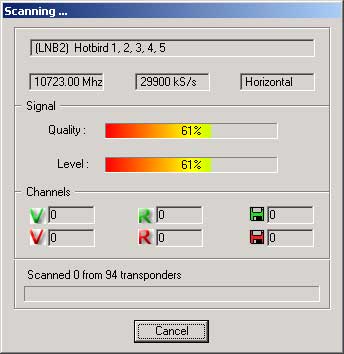
Step 15.
Now you have selected the satellite you are going to use, you now need to scan the satellite for channels. Do this by selecting 'Channel List' then select 'Channel Search' the following window should be displayed and channel scanning process should begin
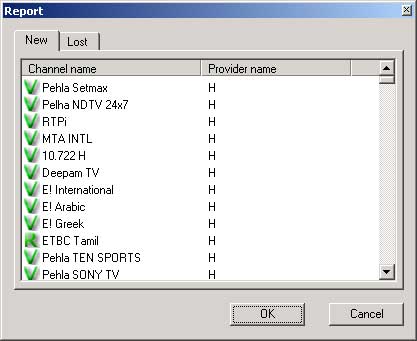
Step 16.
Once the channel scanning process has completed the following window should be displayed, just select 'OK'
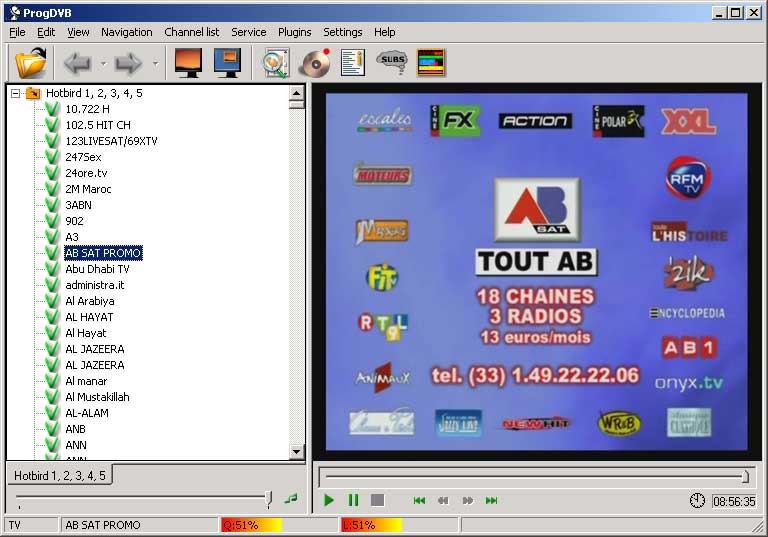
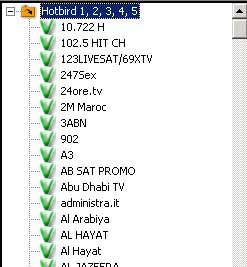
Step 17.
You should now have a list of channels on the left hand side, select one of the FTA channels with a green 'V' icon in this case we selected 'AB SAT PROMO' and within a few seconds you sould be able to see the channel as pictured below
Step 18.
Now you know that ProgDVB is working for FTA channels you now need to get it working for encrypted channels.To do this you first need to download the following files
S2emu.dll
Softcam.keyOnce you have downloaded these files make sure ProgDVB is closed and then drop them into the main ProgDVB directory as shown in the following window
Step 19.
Now start ProgDVB again and select the 'Plugins' menu you should now see the 'S2emu' menu make sure 'Enabled' is ticked.
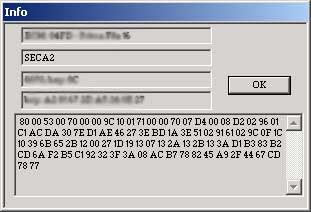
Step 20.
You can check that 'S2emu' is working by selecting an encrypted channel and then select 'Plugins' then 'Info', you should now she a window like the one below if not then you may need to update the 'softcam.key' or the channel may not be supported
Top Tips
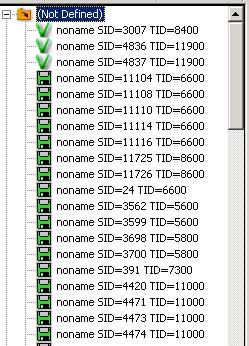
You will notice that the channel list on the left pane will be a mixture of TV,Radio & Data channels as shown below
To sort these so that only TV channels are displayed do the following:
Right click over the channel list pane
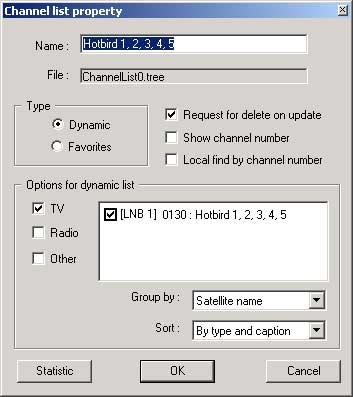
Then select 'Channel List Properties'
Then make sure your setting for 'Options for dynamic list' look
like the screen shot below then select 'OK'.
Your channel list pane should now look like the one below all nice and simple without Radio & Data Channels
Please note this guide is for educational purposes only
It is illegal to view encrypted channels without a valid subscription